 Brunch for four turned into a child safari this past weekend as we hosted our first “adult” brunch in over a month – meaning, we made something with garlic and put out cloth napkins. As per our usual start to Sunday mornings, we began with a pot of strong coffee and Deadmau5. After herding our two boys to the table, we actually managed to eat food on plates, remain in our chairs and share complete stories for about seven blissful minutes. And then abruptly, there was more food was on the floor than on anybody’s plates as Asher announced he was DONE and Everett stubbornly stood up in his high chair after unbuckling his safety belt and my husband and I scrambled around alternatively picking up each child, wiping oily fingers, and placing them at enticing toy stations in hopes that they would entertain themselves for just a minute without choking on a Lego or making stabbing motions with their plastic Chefs knives from the toy kitchen. How dare we adults enjoy ourselves and sit on our butts when there is so much wreckage to be done?
And so, with an apologetic smile and a good-natured laugh, we respectfully invited our brunch guests to join us upstairs to play in Asher’s room. And thus began the two-hour process of slowly upturning and investigating every room of the house which included; playing in Asher’s circus tent while Everett took a nose dive into the empty bath down the hall, settling in small uncomfortable nooks in the hallway as the kids practiced walking backwards, watching in horror as Asher threw all our dirty laundry out of the hamper, playing catch with a bouncy ball in the master bedroom, changing several diapers in the middle of the floor, and nestling in the den to watch three episodes of “Batman”. And throughout the madness of it all, our very dear and very patient friends Adam and Alexia never politely excused themselves with an undertone of “… NEVER AGAIN…”
And so today I am grateful. Grateful for friends. Grateful for flexibility. Grateful for my husband who is willing to listen to our toddler scream all day long that he ONLY wants mommy, and grateful for pie from Hoosier Mama Pie Company which makes it all worth while. So come join us for our next Child Safari brunch, or host your own with today’s simple recipe for Bruschetta Pasta!
BRUSCHETTA PASTA
1 pound of linguine pasta (my photo depicts angel hair)
1 cup of sun-dried tomatoes soaked in water for 15 minutes
4 large Roma tomatoes
1 bunch of fresh basil
1 cup medium green olives, pitted
3 garlic cloves
1/3 cup olive oil
Juice of 1 lemon
In a food processor, combine all ingredients and pulse until blended but still chunky. Bring a large pot of salted water to boil over high heat. Add the pasta and cook 8 minutes. Drain well then combine with tomato mixture and toss until the pasts is coated. 
 This weekend I had the immense pleasure of escaping to NYC for my friend Stephanie’s baby shower for two glorious nights and three full days. From sunning on their rooftop deck in Hoboken overlooking the musky Manhattan skyline, to prancing around Times Square searching for overpriced NYPD-themed stuffed animals for my boys back home, to spending $11 on the smallest glass of wine in the world during intermission at the powerful performance of “All The Way” at the Niel Simon Theatre, I loved every minute of the energy, power, and thrill of the big city. But more importantly, I loved being present to welcome my friends into the wonderful world of parenthood … and to wish them luck with her 5-floor walk-up.


 In the Western World, turmeric root is often used as an agent to color curry powders, mustards, butters, and cheeses. But in the Eastern World, turmeric root is widely used as a medicinal ingredient used to treat inflammatory and irritated skin conditions, and to encourage healthy digestion and liver function. Surprisingly, just 1 tablespoon of turmeric contains 15% of your daily iron needs and even contains a moderate amount of vitamin B6 so it’s health benefits are verifiable. Native to Southeast Asia, turmeric has been considered highly auspicious and holy in Hindu and Tamil spiritualism for millennia so I find it especially intriguing as a spice.

 Once a year we get professional family photos taken so that we can have photos of my kids with pants ON and me wearing make-up. Inevitably the day starts with screaming, bribes of lollipops, white truths about going to a “play date” and hurriedly packing dry snacks that can’t ruin the clothes that I painstakingly scoured at Target to find that match in size 3T and 12 months. I get exactly 3 minutes to apply makeup and tell my husband to tuck in his shirt, and then I pack a bag of back-up clothes in case things go horribly wrong. Upon arrival, the kids promptly run rampant and immediately need snacks. We gather them up in arms, and after each group photo the photographer probes “Do ALL of you need to be looking at the camera?” Yes. Snap. “OK, but do ALL of you need to be smiling???” Thanks to the magic of Renee Gooch and
  So why not share a messy recipe to pair with the clinically clean beauty of the photography studio?! This week I made vegan BBQ Lentil Mushroom Quinoa Burgers, once again found on Veg Kitchen with Nava Atlas. Served on a whole-grain bun, these make for a healthy lunch and actually hold together better the day AFTER you make them.


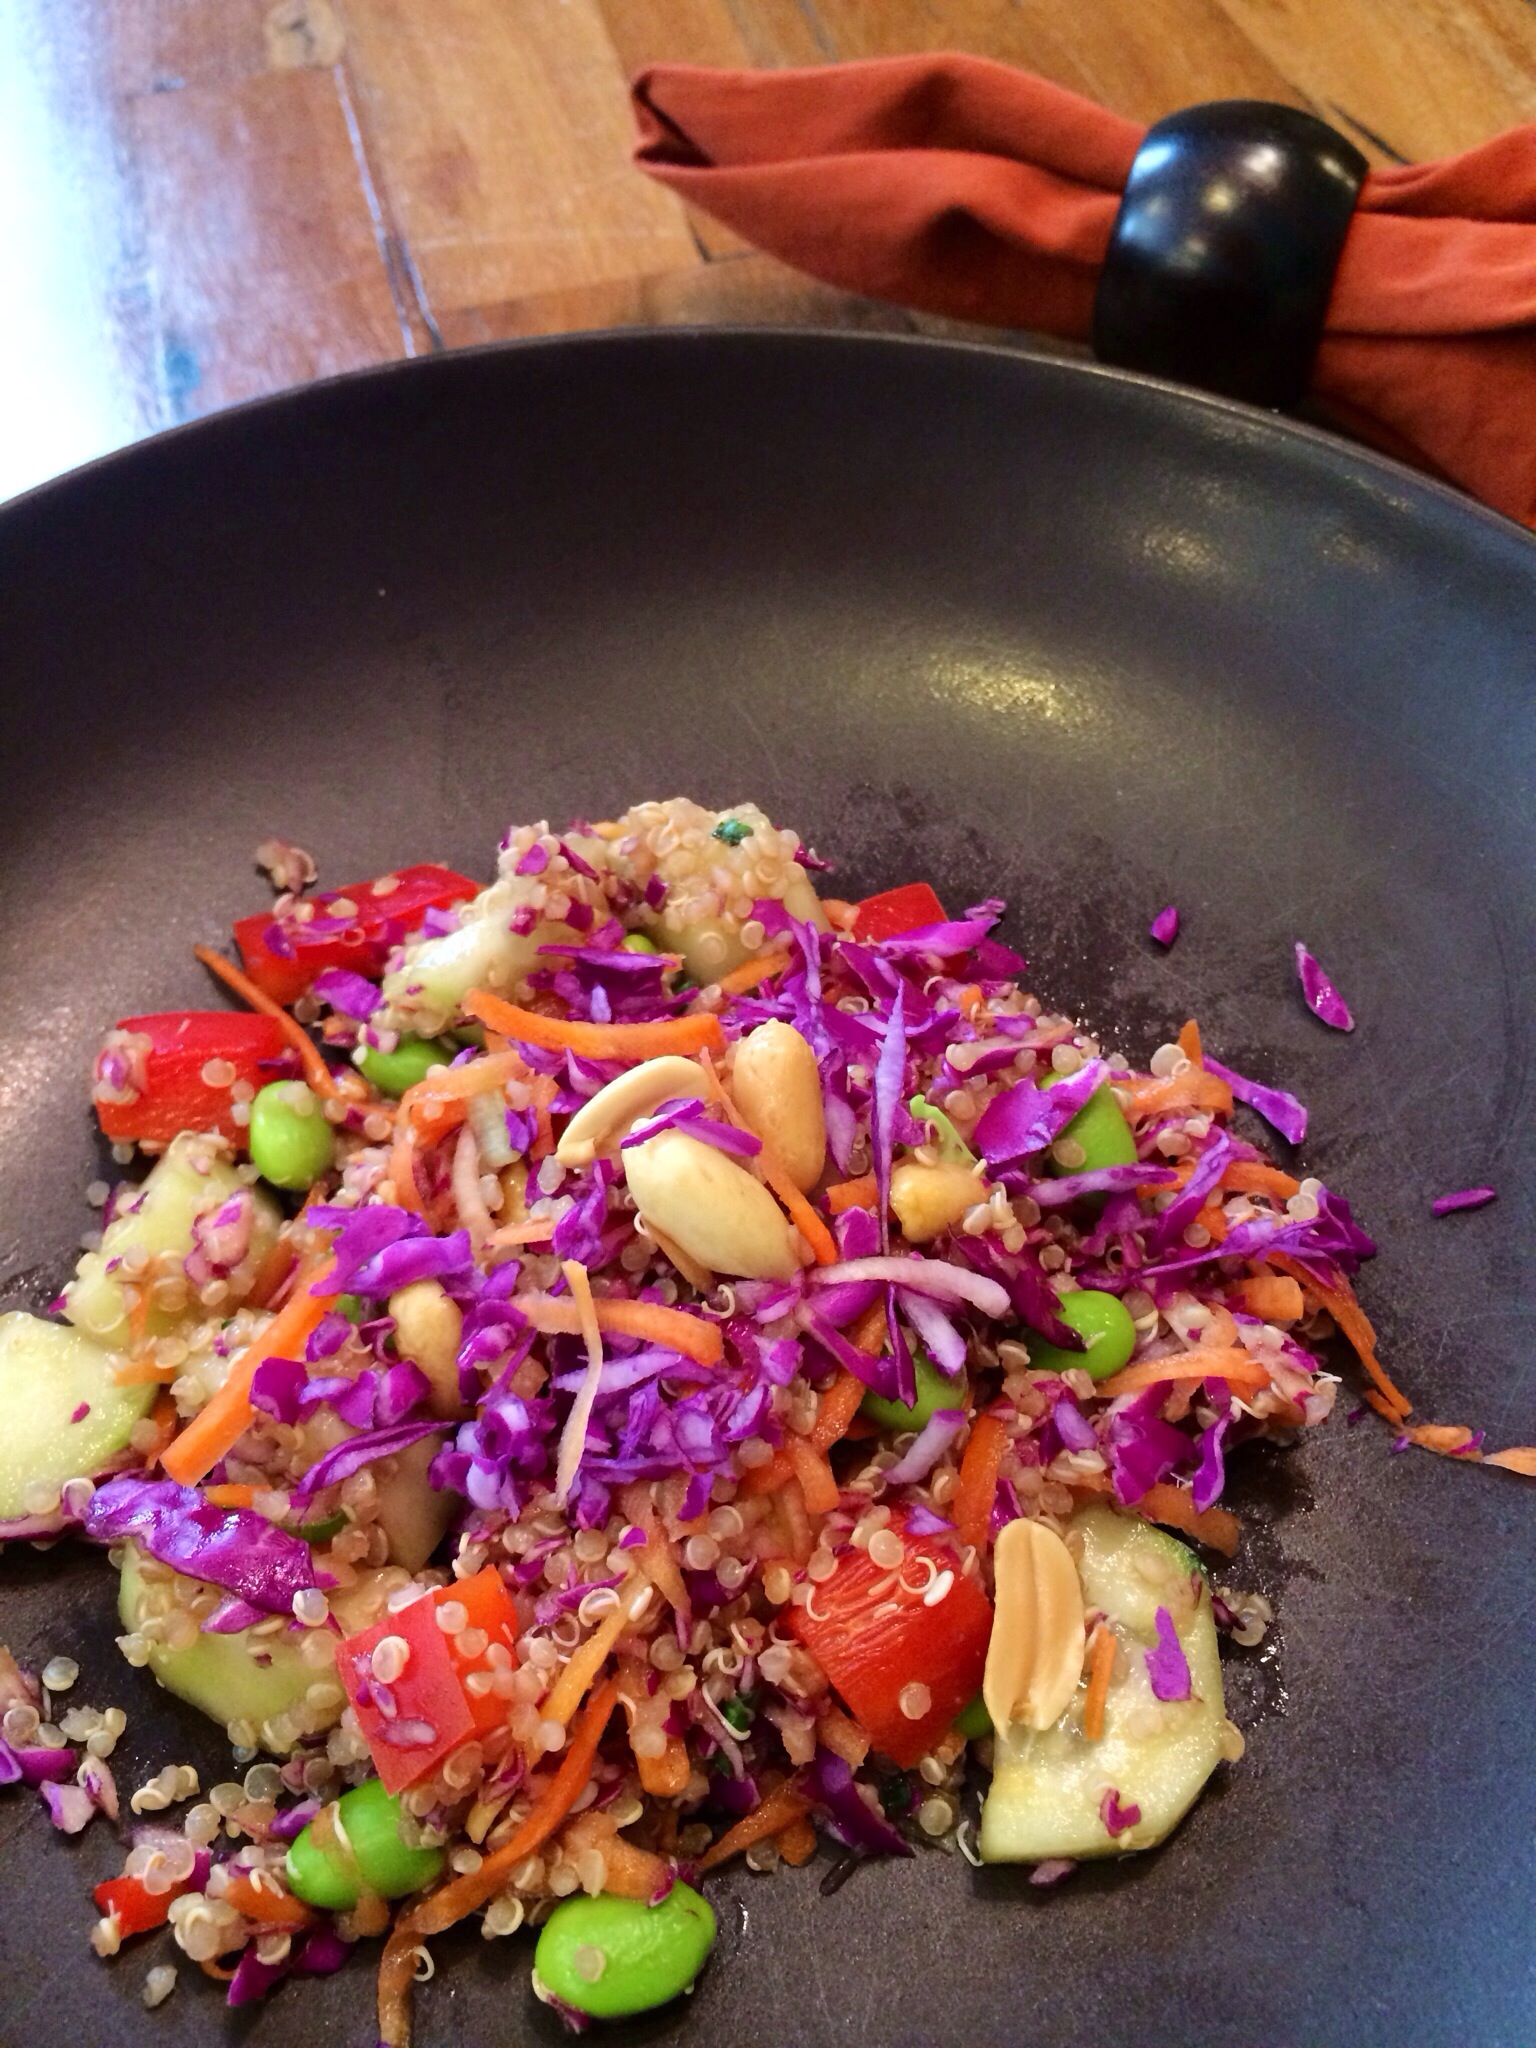
 While I am not vegan, I do constantly get questioned about my vegetarianism and raising my kids vegetarian, which is particularly baffling to people living in the Midwest. So I have made it my mission to share with the world as many vegan recipes as I can come up so I don’t have to hear “What do you eat? Pasta???” There is a world of flavorful and indulgent ethnic foods which embrace vegan ingredients, including Thai, Indian, Mediterranean, Middle Eastern, and Central American, all of which I love to cook. Which naturally leads me to my recipe of the day, Red Cabbage Slaw Taco Salad! This is a very clean, refreshing, and filling dish that can be eaten as a side salad or taco stuffing, and still taste good four days later (I’m eating it right now!)